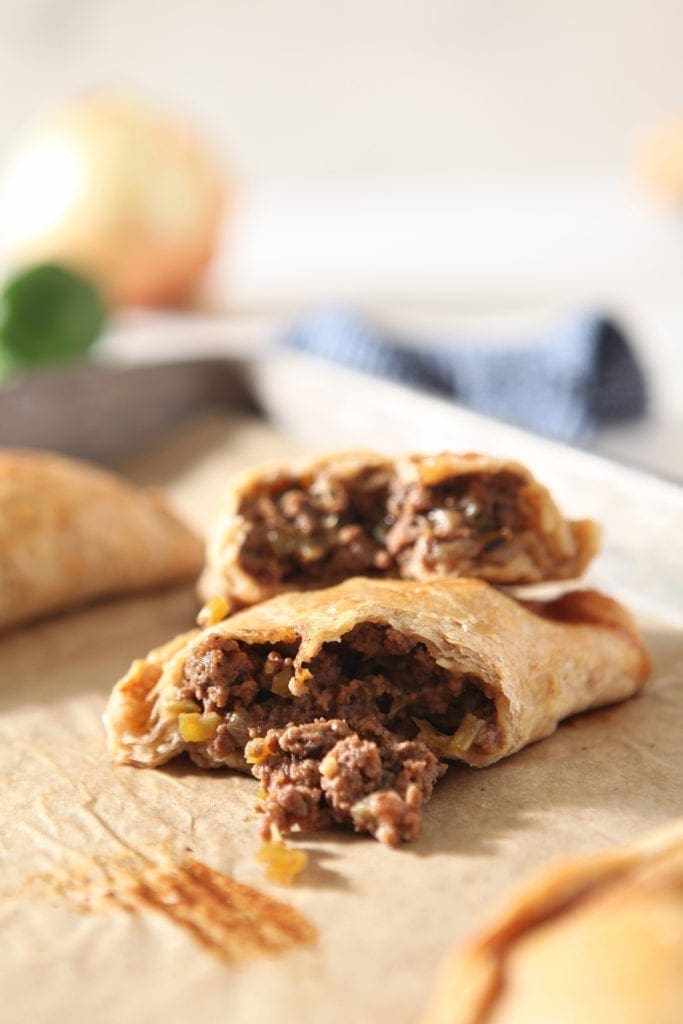
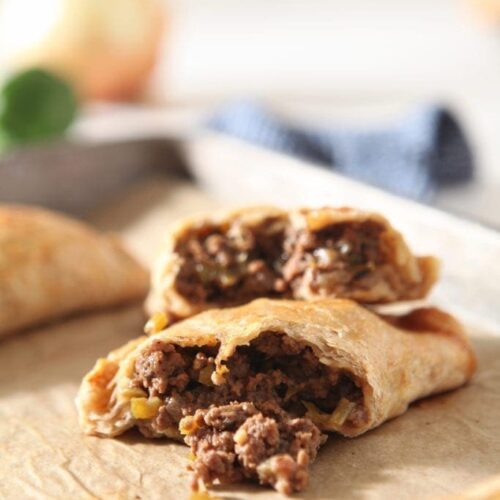
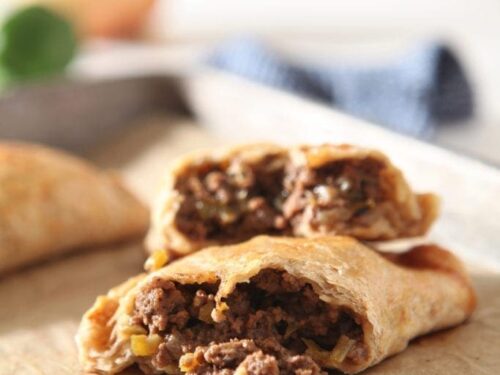
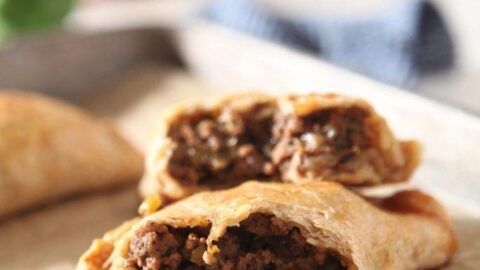
Originating in Central Louisiana, Natchitoches Meat Pies are traditional savory hand pies. Learn how to make this meat pie recipe with a flavorful beef filling and a flaky pastry crust that are perfect for sharing at any type of gathering.
Recipe by Erin Parker, The Speckled Palate on October 14, 2019
Prep time: PT45M
Cook time: PT30M
Total time: PT255M
4.31 stars (13 reviews)
appetizers, baking recipe, hand pies, Louisiana, meat pies
- Use a sharp knife to chop 1 yellow onion, ½ green bell pepper, 1 rib celery and 3 garlic cloves finely. (You want it to be as chopped as possible because you don’t want giant chunks of veggies in the meat pies.)
- Heat 1 tablespoon extra virgin olive oil in a cast iron skillet over medium-high heat.
- When the skillet is hot, add the veggies, and season with salt and pepper. Cook for 3-5 minutes, or until the vegetables are translucent.
- When the veggies are translucent, add the 16 oz. ground beef. Season with 1 teaspoon kosher salt, ¾ teaspoon Tony Chachere's Salt-Free Creole Seasoning, ½ teaspoon black pepper and ¼ teaspoon cayenne pepper.
- Break up the meat using the back of a wooden spoon, and move around the skillet as it cooks.
- When the beef has browned, sprinkle in 1 tablespoon all-purpose flour, and cook for 1-2 minutes. (We want this to be mixed with the beef mixture so that it can thicken the stock, which is poured in next.)
- Pour in ½ cup beef stock, and stir to mix with the ingredients. Cook for 1-2 minutes, or until most of the liquid has been absorbed by the meat mixture.
- Remove from the heat, and transfer to a food-safe storage container. Refrigerate for 2-3 hours, or until cold.
- With a cheese grater, grate the frozen 1 cup unsalted butter. Once everythinghas been grated, transfer the butter back to the freezer to stay cool.
- Sift the 2 cups all-purpose flour and1 cup whole wheat flour with 1 tablespoon kosher salt in a large glass bowl.
- Pour 1 ½ cup water into a glass with ice cubes.
- Remove the butter from the freezer.
- Using a dough blender or a fork, cut the butter into the flour mixture until the fats appear to be the size of peas and the texture of wet sand.
- Add ¼ cup of water on top of the flour-butter mixture at a time.Use a plastic spatula to lightly fold the flour over the liquid. Do not stir.
- Add ¼ cup of water at a time until the dough begins comingtogether, then add water 1 tablespoon at a time so that you don’t make it too wet.
- When it’s ready, the dough should just hold together whenpressed, and you should be able to see flecks of butter in the crust.
- Form the dough into a round and wrap tightly in plastic wrap.
- Refrigerate at least one hour or overnight.
- On a flat, floured surface, roll out the dough using a rolling pin until ¼” thick.
- Using a large biscuit cutter or a small dessert plate to cut the dough into 5-6” rounds. (You can go smaller, but I like a bigger hand pie for this. It’s also easier to work with when the rounds are larger.)
- Measure 2 heaping tablespoons of the filling into the center of the dough.
- Fold the dough rounds in half, pressing the edges using your fingers and crimp or seal with a fork’s tines. (You want to make sure they’re truly sealed, or they’ll burst in the oven.)
- Repeat the process until all the hand pies have been made.
- Using the fork or a knife, poke a few holes into the top of the hand pies.
- FREEZE or refrigerate 1-2 hours so the dough can firm up again. (If freezing for days on end, the bake time will be longer. You can also let the meat pies unfreeze in the refrigerator 1-2 hours before baking.)
- Preheat the oven to 350°F. Line a sheet pan with parchment paper, and set aside.
- Crack an egg into a bowl. Use a fork to break the yolk.
- Place the chilled (frozen or refrigerated) meat pies on the prepared baking sheet. Brush the tops with the egg wash.
- Once the oven is preheated, bake the meat pies for 30-35 minutes if refrigerated. Bake them for 45-55 minutes if frozen. (Keep in mind that the bake time will vary depending on the size and how chilled your hand pies are, so keep an eye on yours!)
- Once golden brown, remove from the oven, and let cool slightly before serving.