This easy, step-by-step fresh pasta recipe will teach you how to make soft, silky homemade pasta made from flour and eggs, in just 1 hour (with or without a machine). It's an all purpose pasta dough: use it to make homemade fettuccine, pappardelle, homemade ravioli and more. For timing, the process is broken up into 3 parts: making the dough, rolling the dough into pasta sheets, and cutting the pasta into noodles. Tips shared below for using a Kitchen Aid Stand Mixer, food processor and doing it by hand.
Recipe by Emilie Raffa on December 24, 2021
Prep time: PT1H
Total time: PT1H
5 stars ( reviews)
best homemade pasta recipe, easy Italian recipe, homemade pasta without a machine, homemade pasta dough
- Add the flour to a large bowl. Make a well in the center; add the eggs and yolk.
- Whisk together with a fork, and then combine with the flour. When the texture becomes stiff, finish by hand to form a rough dough. If dry bits of flour remain after a few minutes of mixing (be patient, it’s a dry dough) add a few drops of water or olive oil to bring the dough together.
- Form the dough into a ball, cover with an upturned bowl or with plastic wrap, and let rest at room temperature for 10-15 minutes- it will be easier to knead.
- Knead the dough for 5-7 minutes. Do this by folding the dough over itself, pushing it forward with the heel of your hand, turning slightly as you go. I literally rock the dough back and forth (watch the video). The texture will be very stiff at first- it’s not bread dough. But rest assured, by the 2 minute mark it will start to soften. Keep kneading until the dough is soft, malleable and has a talcum-like finish. It should “bounce back” slowly when poked.
- Form the dough into a ball, cover tightly with plastic wrap, and rest at room temperature for 30 minutes.
- On your work surface, cut the pasta dough into 4 pieces. Working with one piece at a time, flatten the dough into a 6-8inch oval patty. Keep the remaining doughs covered in wrap otherwise they will dry out.
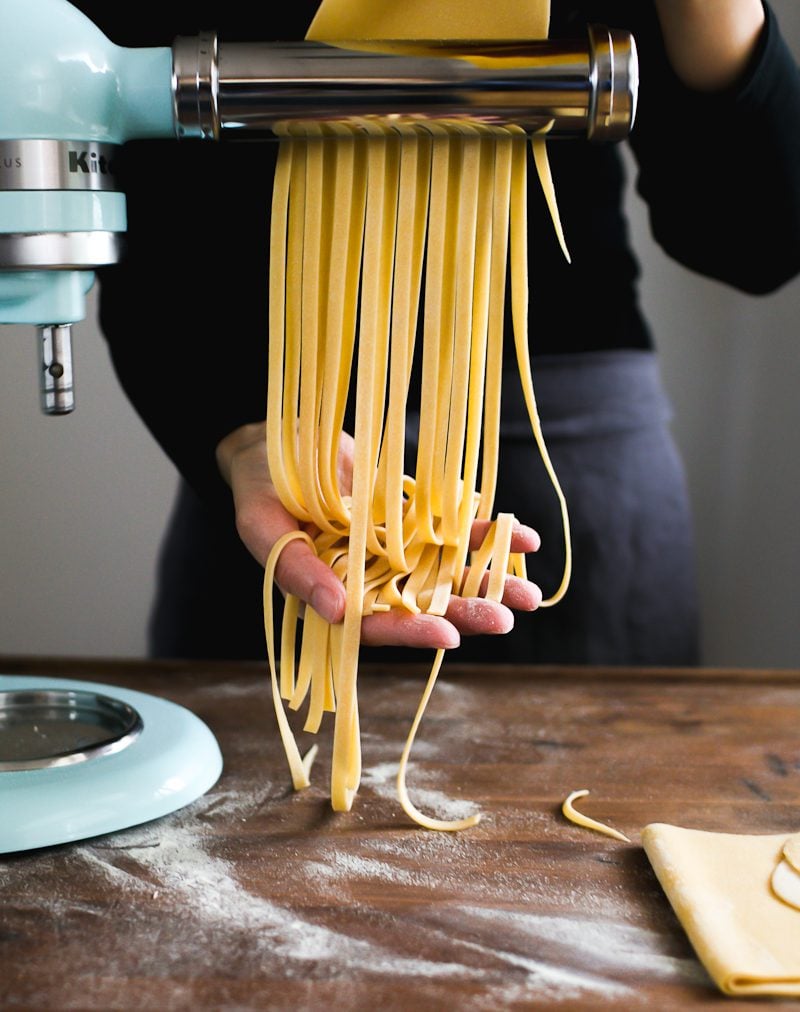
- Set the pasta roller to #1 which is the lowest/widest setting on the Kitchen Aid. With the machine running, send the dough through the roller. Now, send it through again (so, 2x total). Note: if you are using a hand crank pasta machine, refer to the manufacture’s specific instructions for rolling the dough- the settings might differ but the process is the same.
- Continue to roll the dough through settings #2-4, (2x) on each setting. Do not pull on the sheet as it comes through the roller; just guide it along gently. If at any point the dough becomes sticky, dust with semolina flour. I keep my work surface dusted with semolina at all times. This way I can coat both sides of my pasta sheet easily and quickly while I work.
- Your pasta sheet is ready when it’s beautifully thin and somewhat translucent (you should be able to see your hand underneath). Don’t worry if the ends are not perfectly straight; you can always trim them with a knife.
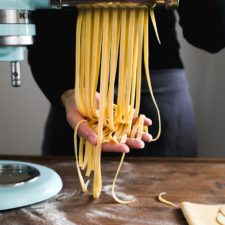
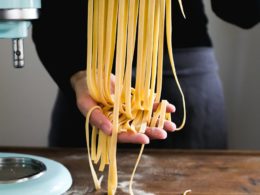
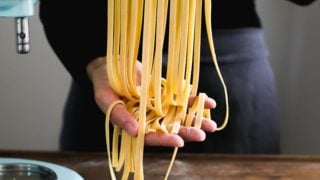
- To finish, dust the pasta sheet generously with semolina, fold it in half, and place onto your floured sheet pan. Cover with a kitchen towel. Repeat the rolling process for the remaining 3 doughs.
- Before cutting, I like to dry my pasta sheets ever so slightly. This firms up the final texture giving the strands a more “leathery” finish, rather than a soft and doughy feel (this will prevent the pasta from sticking together later on).
- To Dry
- To Cut