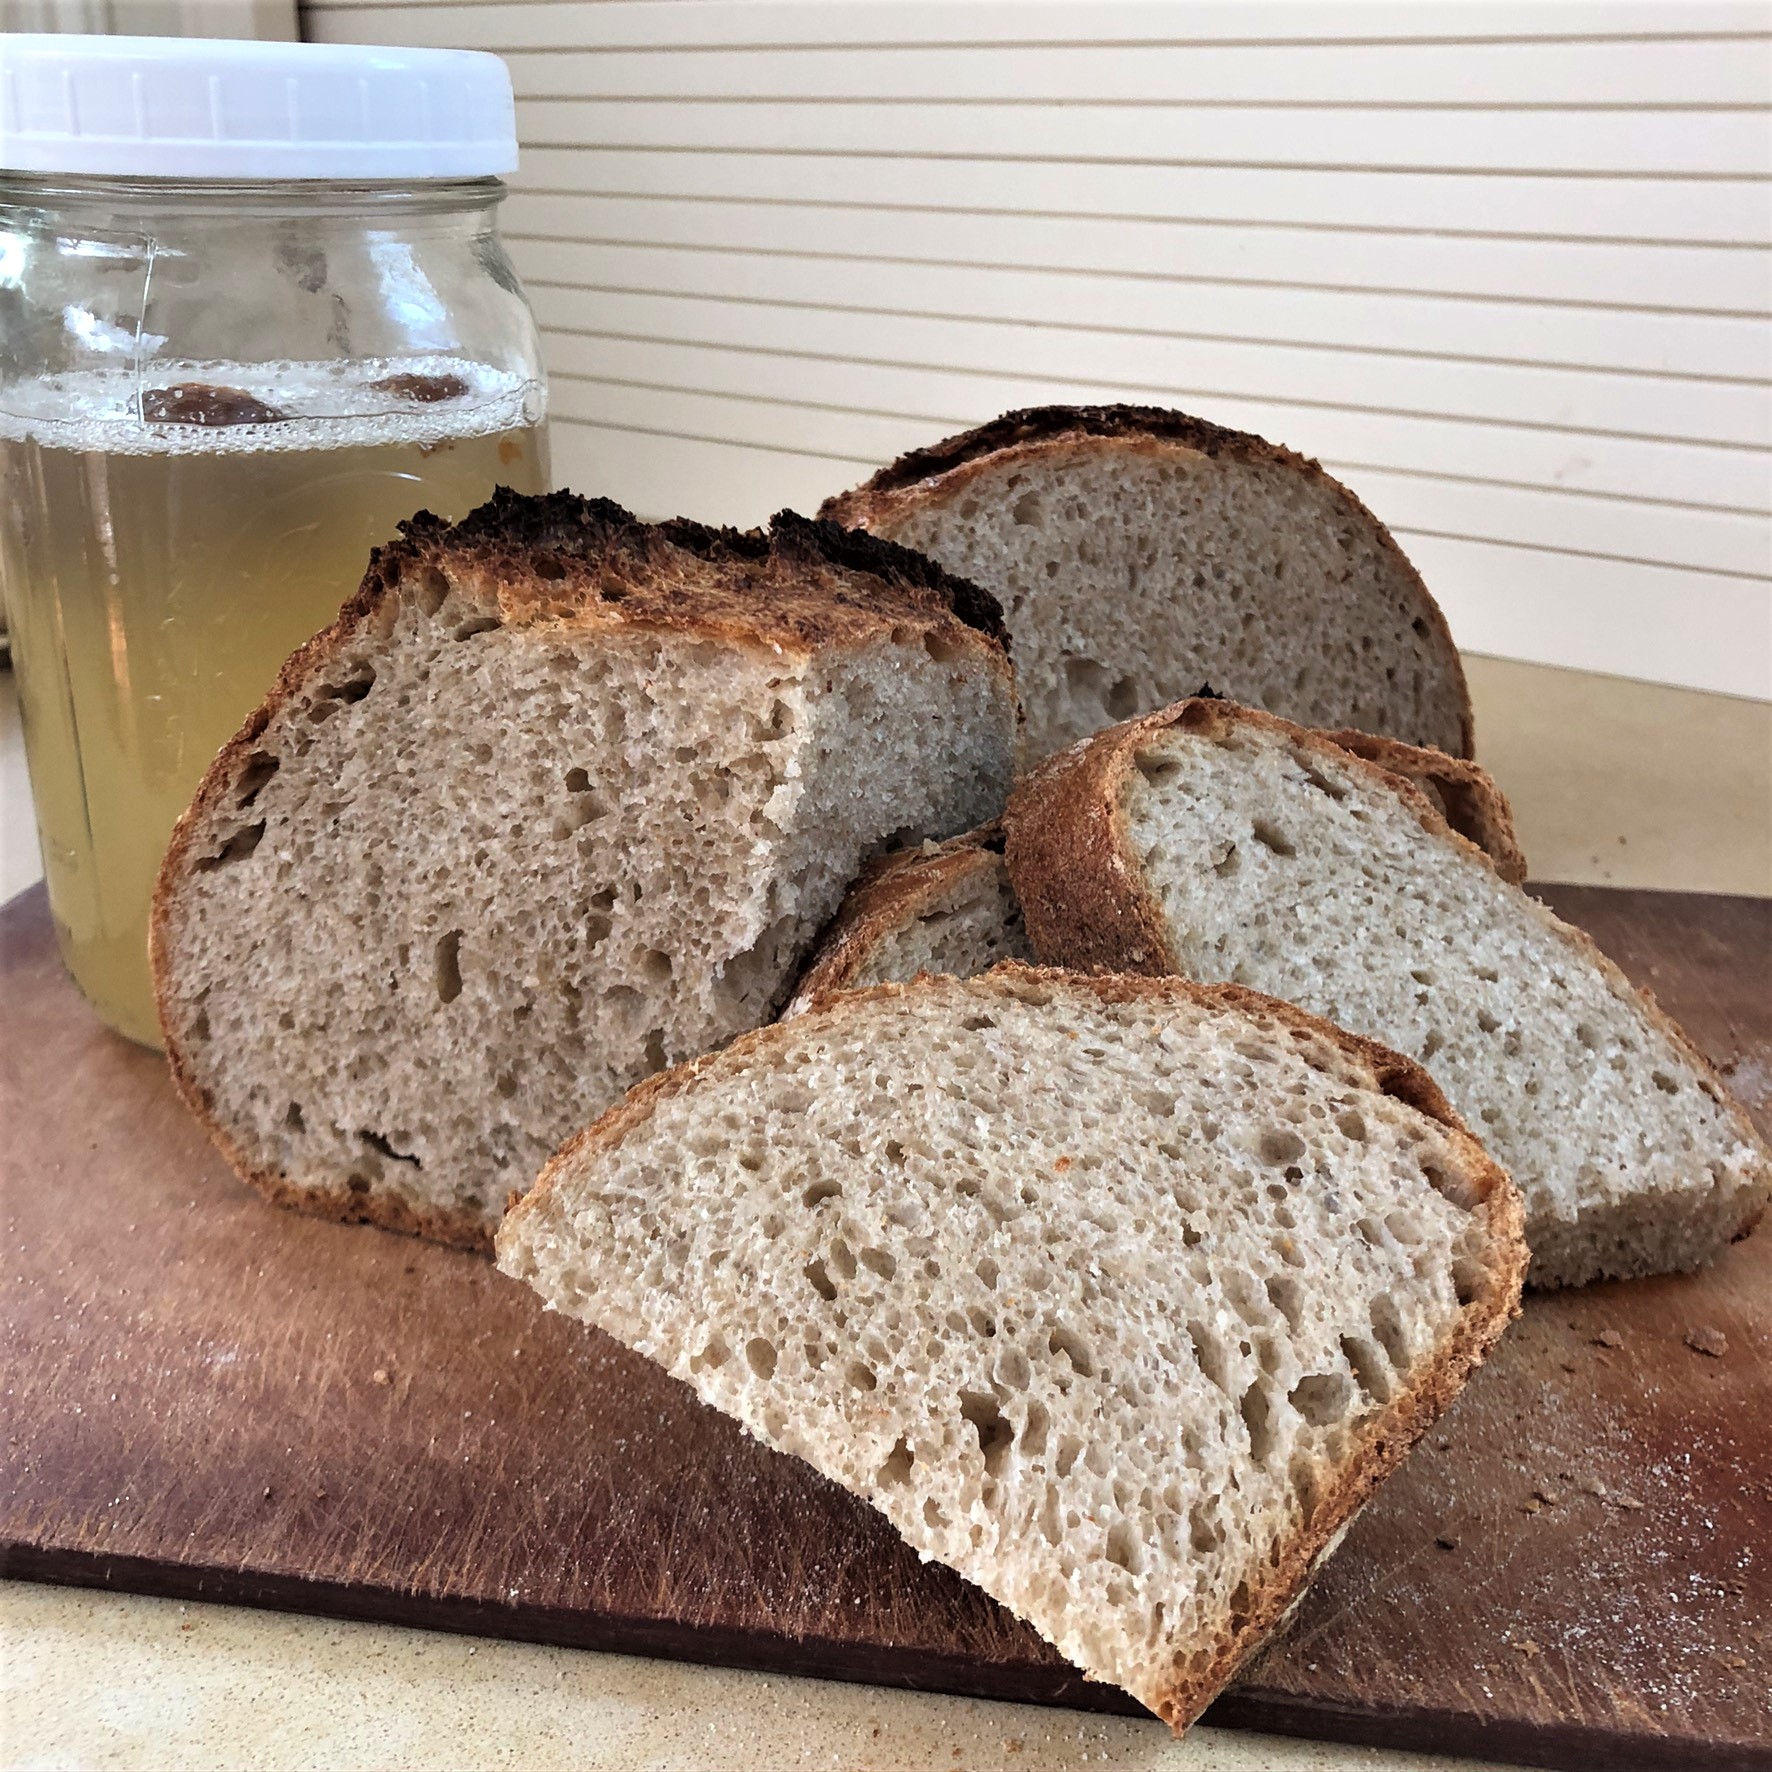
There are many ways to adapt bread formulas to suit your preference for types of flours, addition of nuts, herbs, seeds, or whole cooked grains. My recommendation is to begin with the basic formula below. Keep notes for yourself of any changes to my recipe as well as your room temp and proof times. Soon you'll be customizing your own recipe and I hope having as much fun as I do. And of course, enjoying and sharing fabulous bread!Note that this recipe is written in grams because measurements really do make a difference. I've provided some cup measures but I recommend to use a scale because cups vary significantly. Remember, you need to make the Yeast Water 5-7 days ahead of baking. Once it's made, only a portion is used for this recipe and the remainder keeps refrigerated until ready to bake again. Read here How to Make Wild Yeast Water - Rosemary Mark.Read through the recipe below to follow the two-day process with 'preferment' for exceptional bakery style bread, Or, stir up a batch of dough now using my Overnight No-Knead Yeast Water Bread - Rosemary Mark recipe for yeast water, and in 18 -24 hours it will be ready to bake. The quicker version without preferment is a little less 'bakery style' and is still a fabulous home-baked loaf.
Prep time: PT2880M
Cook time: PT45M
Total time: PT2925M
Rating
5 stars (13 reviews)
Ingredients
100 grams Yeast Water,(~1/3c plus 1 Tbsp), shake before measuring and heat to 85-90F
100 grams whole wheat spelt flour or whole wheat (~3/4 cup) (or 50:50 any whole wheat or rye flour and all-purpose white flour)
700 grams white bread flour (~5-1/2cups + 2Tbsp)
200 grams whole wheat flour (~1 cup + 2Tbsp)
550 grams tap water or filtered water (~2-1/3 cups) (or 600 grams water for softer/moister crumb)
100 grams Yeast Water (~1/2 cup minus 1Tbsp), shake before measuring
18-20 grams salt (~2Tbsp Diamond Crystal Kosher salt)
Categories
Bread
Steps
MAKE PREFERMENT 24-48 hours before you want to bake bread.Stir together the 100 grams 90-95F Yeast Water and 100 grams whole wheat flour. The mixture will be thick enough to nearly hold a chopstick straight up for a couple seconds. Let stand at room temperature (62-75F) until at least doubled in volume with a slightly domed top. A very active water could double in 6-8 hours, but plan on about 12 hours. More or less time depending on room temperature and yeast water strength.Once the preferment doubles, use or refrigerate for up to two days. Bring to room temperature before proceeding.
MAKE DOUGH 24 hours before planning to bake bread. In a 6-quart container or bowl, stir together the flours. Combine the tap water (or filtered water), and Yeast Water (photo shows cherry YW) in a bowl or 4-cup measure. Heat to 85-90F (in my microwave this takes 60-75 seconds), but no higher than 95F. In winter when the kitchen is cold, the flour could be about 65 degrees, or much warmer in summer; adjust water temperature accordingly.
Stir together the flours and warmed Yeast Water mixture until all the dry and wet are just combined. No need to knead! Let stand 20-30 minutes or up to 1 hour. This is the autolyse stage which hydrates the flour and starts to activate the enzymes and the gluten forming proteins, improving the dough's ability to stretch and hold shape.
Now pour the preferment and the salt over the dough.
Begin the mixing by lifting and folding the dough over and scooping up from the bottom of the container. Then pinch across the dough making chunks, then refold over itself until all the ingredients are combined. This usually takes me 2-3 minutes.
Let the dough rest 30 seconds, then do a couple more folds and let it relax into the bowl. Cover the container (plastic shower cap works well) and let stand at room temperature for 30 minutes. Ideal temperature is between 75-82F. If less than 70F, expect the dough to take a lot longer to proof.
FOLDING: Now you'll start the series of three folds every 30 minutes (the time doesn't have to be exact, even an hour is ok). Here's how to fold: lift an edge of the dough as far as it will go pulling gently, then fold it over itself. Do this 4-6 more times around the bowl to make a smooth-ish ball.
The dough tightens with each stretch so the last time it barely stretches up. Cover and let rest again about 30 minutes. Repeat the stretching 3-4 times at interval of about 30 minutes, which will take about 2 hours. Don't stress if you let it go longer, just not more than 3 hours.
PROOFING (also called bulk fermentation): Now cover the bowl and let it do it's thing. Time will vary greatly from 4 or 5 hours to 8-10 hours depending on room temperature. I set the container on a cloth, not directly on the cold countertop. Or, in a proof box such as this folding proofer and set the temperature to 75F. If I need it to go faster because of my schedule for shaping, then I use 78-80F. Up to 85F would be ok, but I prefer the lower temp which adds to flavor development.
Be patient! Amount of rise is related to dough temperature. See notes*. If dough is on the cooler side, 65F, let it double the original volume. If 70-75F, let it rise about 75%. If dough is 75-80F, 30-50% rise is enough. Look for a slightly domed top and some bubbles on the surface. Also use the finger poke test by coating a finger with flour and indenting about 1/2-inch. Look for a slow rise back with the hole slowly enclosing. If it springs back immediately, it needs more time; if it doesn't spring back at all it is over-proofed.
This is top-down view of well-proofed dough. Domed with visible bubbles.
Photo below is very active dough; probably over-proofed. Over-proofing weakens the gluten which tends to reduce the final rise (called oven spring) during baking. It may be a denser bread, contrary to expectation of making a lighter bread from such big bubbles. This dough still made delicious loaves!
Gently scrap the dough out of the container onto a floured work surface.
Flour the center top of the dough and cut in half with a dough scraper or knife.
SHAPING Make 3-4 gentle stretch and folds to shape each piece of dough into a rough ball. I prefer to do this on a slightly damp surface, some bakers use a lightly floured surface. Let rest 20-30 minutes. The dough should expand and bubbles form on surface. Then turn and tuck with hands or one hand and a bench scraper, moving around the ball several times to form a smooth and taught ball. Use little or no flour allowing the dough to create tension on the work surface. The dough will become more taught, and bubbles will form on the surface as the dough is rounded into a ball. Prick any very large bubbles as they tend to burn during baking. See the link in the notes below to Ken Forkish on YouTube for detailed instruction on folding and shaping dough. There are many different techniques!
FINAL PROOFTurn into lightly floured cloth lined bowl or banneton, and cover with plastic. Refrigerate either covered with plastic or uncovered 8-16 hours*. I've left refrigerated up to 36 hours, and had variable results sometimes more or less open crumb.*If baking directly on Dutch oven, the dry surface helps prevent sticking. I usually bake on parchment or silpat liner, which prevents sticking, so I cover the banneton with plastic during cold proof. A shower cap, bowl cover, or plastic bag work well.
Details of hot or cold bake method described here: Hot Bake or Cold Bake - your choice! - Rosemary MarkBAKINGOption #1 Preheated oven, place cast iron or ceramic Dutch oven in cold oven on the highest rack that fits. Heat to 500F conventional or 475F convection (my oven takes 45 minutes). CAREFULLY remove pan from oven and turn lightly flour dusted dough directly from bowl or banneton into the hot pan. OR, invert by covering with a sheet of parchment and turning out onto a rimless sheet pan or pizza peel, then sliding into Dutch oven.Score top (or a slash a smile!) with a lam or sharp knife, then immediately cover and return to oven. Reduce temperature 25 degrees. Bake 25 minutes covered; remove lid and bake additional 15-25 minutes until deep golden brown. NOTE: IF the bottom crust is too dark, next time pre-heat oven to 475F and bake at 450F. Different Dutch ovens and ovens can heat differently than the pans I've tested.
Option #2 Cold start oven, turn dough into unheated Dutch oven lined with lightly floured parchment or silpat. Dough tends to stick in the cold pan if not lined. Place pan in upper third of oven. Turn on to 475F convection or conventional. I find 475F is fine for convection or conventional; with repetition you can choose for your oven and results preference. Bake covered for 50 minutes. Remove lid and bake additional 5-10 minutes until crust is deep golden brown.
Bake until well browned for the best crust and interior crumb. For extra crisp crust and drier interior crumb, after removing from pan bake on rack additional 5-10 minutes.
Turn out immediately on a wire rack and try not to slice the loaf for at least an hour! Slicing hot will compress the interior and change the texture of the crumb.
Reviews
Eileen on 2026-06-30 (5 stars): I’ve struggled with sourdough- but this is amazing. I used 90% freshly ground wheat with a small anmount of vital gluten and it turned out great! Amazing raise and crumb. Finally a fermented whole wheat bread that acts more like white. Thank you!
Craig Whitley on 2026-04-01 (5 stars): I have an Oval Clay baker which fits perfectly into this oven. Our larger Samsung oven has in the last 4 years burned up 6 ceramic igniters so this smaller oven not only took wear and tear off the main oven but did not heat up the kitchen as much as the full size gas oven. During the final proof, I fill the top of the clay baker with water to add a little more steam. Seems to work quite well.
I sent a link to a Google Photo of one of the breads I made in December. I don't take pictures of every loaf. {Internet has been up/down today, let me know if you did not get the link}
Without your detailed refresh instructions I might have abandoned WYW entirely. Glad I didn't.
Craig Whitley on 2026-04-01 (5 stars): I have an Oval Clay baker which fits perfectly into this oven. Our larger Samsung oven has in the last 4 years burned up 6 ceramic igniters so this smaller oven not only took wear and tear off the main oven but did not heat up the kitchen as much as the full size gas oven. During the final proof, I fill the top of the clay baker with water to add a little more steam. Seems to work quite well.
I sent a link to a Google Photo of one of the breads I made in December. I don't take pictures of every loaf.
Without your detailed refresh instructions I might have abandoned WYW entirely. Glad I didn't.
Craig Whitley on 2026-03-31 (5 stars): Long overdue update. For almost a year now, except for an attempt to go back to a SD bread [still dislike any sour note], I've been using WYW exclusively for my breads. ~ 75 loafs and never a failure.
I thought today would be the exception. Same recipe BF at 77F for 12 hours but little rise and very little rise in final proofing. However, the massive oven spring made up for it. Cold start has become my preferred method. As my BF and final proofing temps are always the same I can't explain this but the final loaf was spot on.
Just using raisins and never a gummy loaf which I still think was due to the high level of pectin in crab apples. Your refresh schedule is spot on. So much flavor developed via the long BF and Poolish.
Just a side note, for the last 3 months I've been using a new Breville Smart oven and the consistency has been outstanding. I only bake 1 loaf at a time so the size is perfect.
Daniel on 2026-02-18 (5 stars): So, I made your recipe exactly as you wrote it and it worked really well. I'll try it again without the extra wyw, substituting water instead. My wyw was very active. When I cold proofed the dough it continued to rise and was domed higher than my banneton. It was a bit overproofed but turned out ok. Didn't get quite the ovenspring I was hoping for. I'll tweak it. Thanks for sharing your knowledge.
Craig Whitley on 2025-04-27 (5 stars): Excellent! I was initially put off by the 3 day process however, It was actually so simple to make and every step along the way behaved exactly like I would want.
I put everything into Bakers Percentages then scaled it 0.6215 to = 1100 grams of dough which is the right size for my clay baker.
I fresh milled the Red Hard Wheat berries and used the Cold Start method for baking and it came out perfectly.
Will try this recipe again substituting the Red Hard Wheat berries for Khorasan berries [my favorite flour] and again fresh milling them.
Your very detailed explanation of maintaining the Wild Yeast Water is why I wanted to try the whole process. I had been turned off by a series of WYW gummy failures but I believe they were due to my use of Crab Apples and their natural high pectin levels. Went back to simply raisins for this WYW.
Thank you for the very professional presentation.
Mary on 2025-04-09 (5 stars): I had no idea how satisfying it is to bake delicious, beautiful bread! Since learning how to make wild yeast from you, I’ve been making at least a couple loaves every week. We have plenty of neighbors and friends who love fresh baked bread! And the dough is so, I don’t know… forgiving. I overproofed a batch last week so made seeded rolls, which were crunchy and chewy in all the right ways. The little boys across the street ate them up with their morning eggs.
Rosemary, I have so much gratitude for you teaching your class at Civic Kitchen and the way you taught it. Very approachable. And these instructions are perfect! Thank you.