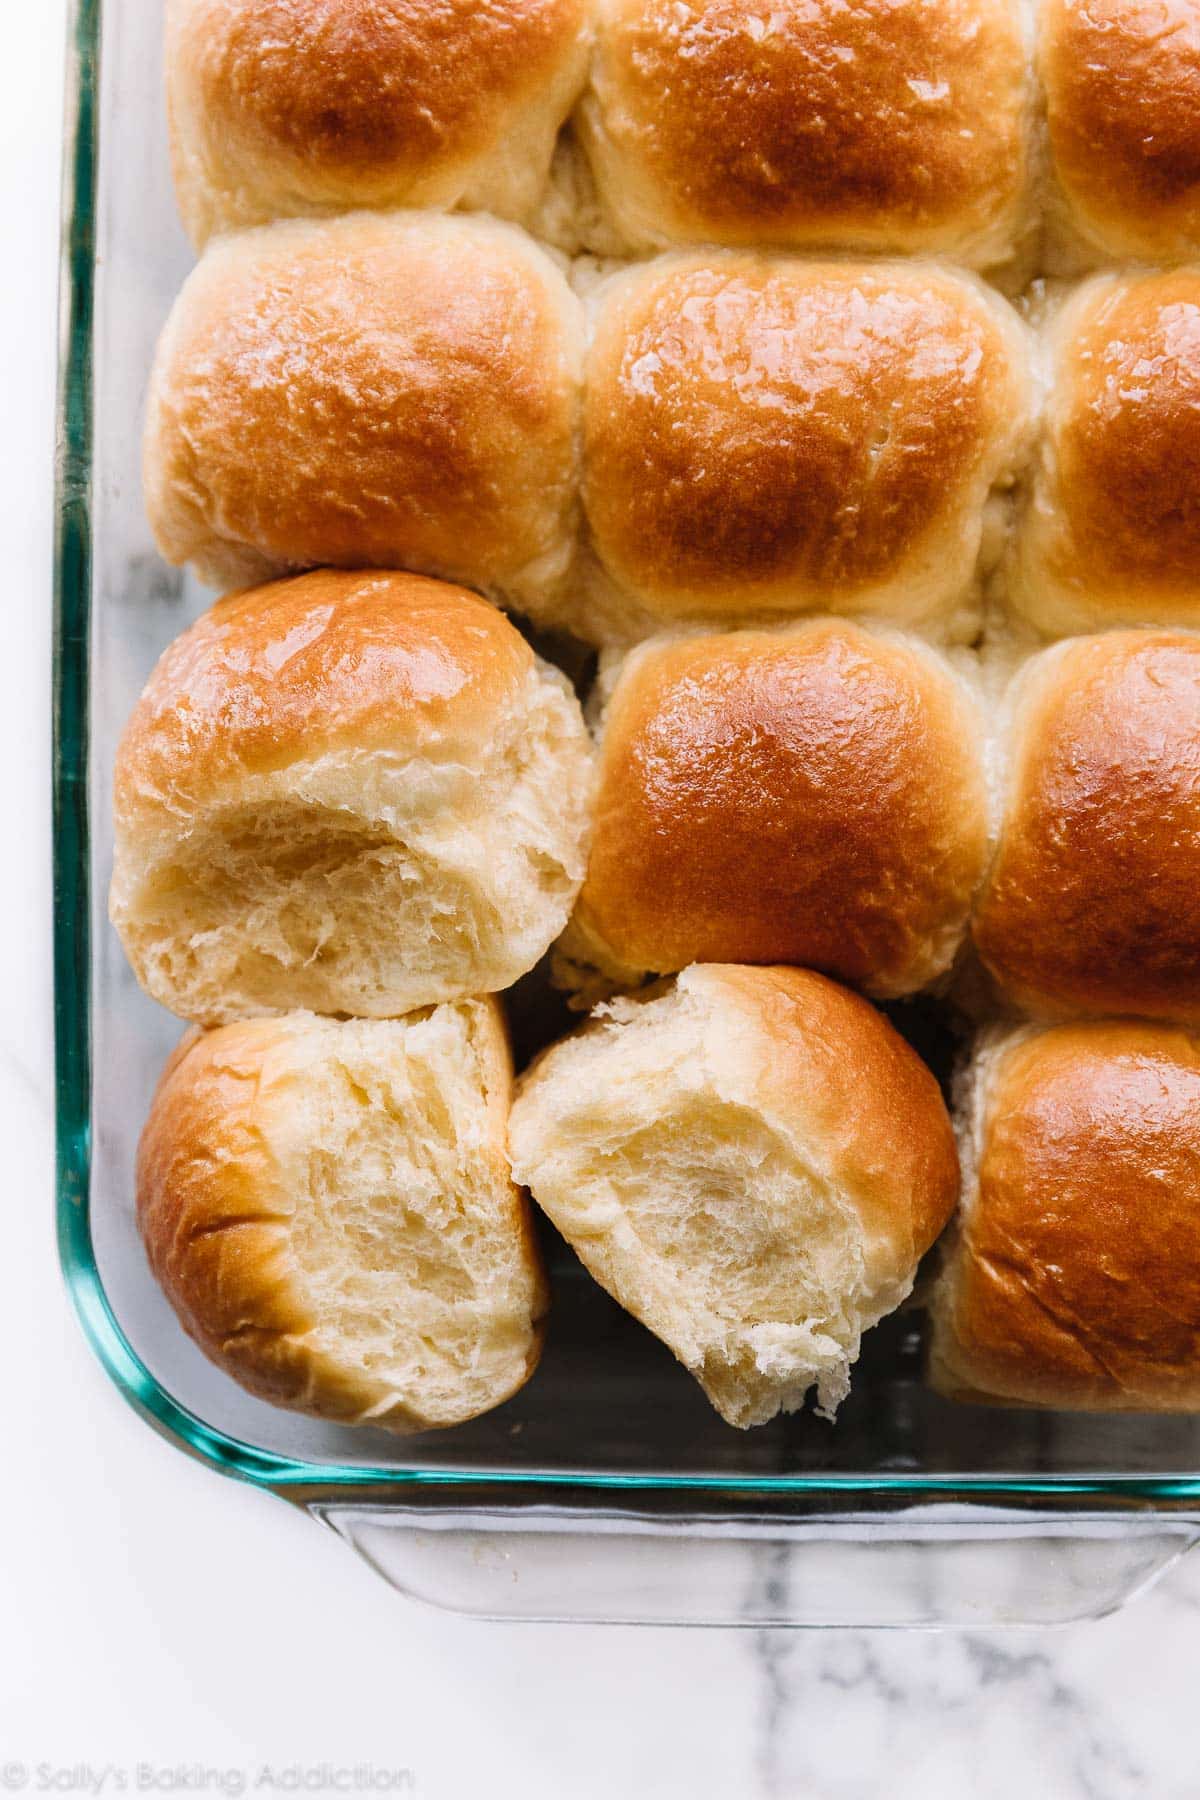
You only need 7 ingredients to make these dinner rolls. Flaky, soft, and buttery, these fresh dinner rolls outshine any main dish. See recipe notes for freezing and overnight instructions. You can also reference my Baking with Yeast Guide for answers to common yeast FAQs. This recipe is also in my cookbook, Sally's Baking 101.
Recipe by Sally on April 2, 2019
Prep time: PT3H25M
Cook time: PT22M
Total time: PT3H45M
Rating
4.8 stars ( reviews)
Keywords
bread, rolls, yeast rolls
Ingredients
1 cup (240ml) whole milk, warmed to about 110°F (43°C)
2 and 1/4 teaspoons Platinum Yeast from Red Star instant yeast (1 standard packet)
2 Tablespoons granulated sugar, divided
1 large egg
1/4 cup (4 Tbsp; 56g) unsalted butter, softened to room temperature and cut into 4 pieces
1 teaspoon salt
3 cups (390g) all-purpose flour or bread flour* (spooned & leveled)
Whisk the warm milk, yeast, and 1 Tablespoon of sugar together in the bowl of your stand mixer. Cover and allow to sit for 5 minutes. *If you do not own a stand mixer, you can do this in a large mixing bowl and in the next step, mix the dough together with a large wooden spoon/silicone spatula. It will take a bit of arm muscle. A hand mixer works, but the sticky dough repeatedly gets stuck in the beaters. Mixing by hand with a wooden spoon or silicone spatula is a better choice.*
Add the remaining sugar, egg, butter, salt, and 1 cup flour. With a dough hook or paddle attachment, mix/beat on low speed for 30 seconds, scrape down the sides of the bowl with a silicone spatula, then add the remaining flour. Beat on medium speed until the dough comes together and pulls away from the sides of the bowl, about 2 minutes. If the dough seems too wet to a point where kneading (next step) would be impossible, beat in more flour 1 Tablespoon at a time until you have a workable dough, similar to the photos above. Dough should be soft and a little sticky, but still manageable to knead with lightly floured hands.
Keep the dough in the mixer and beat for an additional 5 full minutes, or knead by hand on a lightly floured surface for 5 full minutes. (If you’re new to bread-baking, my How to Knead Dough video tutorial can help here.) If the dough becomes too sticky during the kneading process, sprinkle 1 teaspoon of flour at a time on the dough or on the work surface/in the bowl to make a soft, slightly tacky dough. Do not add more flour than you need because you do not want a dry dough. After kneading, the dough should still feel a little soft. Poke it with your finger—if it slowly bounces back, your dough is ready to rise. You can also do a “windowpane test” to see if your dough has been kneaded long enough: tear off a small (roughly golfball-size) piece of dough and gently stretch it out until it’s thin enough for light to pass through it. Hold it up to a window or light. Does light pass through the stretched dough without the dough tearing first? If so, your dough has been kneaded long enough and is ready to rise. If not, keep kneading until it passes the windowpane test.
Lightly grease a large bowl with oil or nonstick spray. Place the dough in the bowl, turning it to coat all sides in the oil. Cover the bowl with aluminum foil, plastic wrap, or a clean kitchen towel. Allow the dough to rise in a relatively warm environment for 1-2 hours or until double in size. (I always let it rise on the counter. Takes about 2 hours. For a tiny reduction in rise time, see my answer to Where Should Dough Rise? in my Baking with Yeast Guide.)
Grease a 9×13 inch baking pan or two 9-inch square or round baking pans. You can also bake the rolls in a cast iron skillet or on a lined baking sheet.*
When the dough is ready, punch it down to release the air. Divide the dough into 14-16 equal pieces. (Just eyeball it– doesn’t need to be perfect!) A bench scraper is always helpful for cutting dough. Shape each piece into a smooth ball. Arrange in prepared baking pan.
Cover shaped rolls with aluminum foil, plastic wrap, or a clean kitchen towel. Allow to rise until puffy, about 1 hour.
Adjust oven rack to a lower position and preheat oven to 350°F (177°C). (It’s best to bake the rolls towards the bottom of the oven so the tops don’t burn.)
Bake for 20-25 minutes or until golden brown on top, rotating the pan halfway through. If you notice the tops browning too quickly, loosely tent the pan with aluminum foil. Remove from the oven, brush with optional honey butter topping, and allow rolls to cool for a few minutes before serving.
Cover leftover rolls tightly and store at room temperature for 2-3 days or in the refrigerator for up to 1 week.
Reviews
Lindsey on 2026-04-05 (5 stars): I used part bread flour and part AP flour, and they turned out great! I got lots of positive reviews from the family!
reba on 2026-04-06 (2 stars): I am an experienced baker. Generally I like the recipes here, so I thought i'd try these. Unfortunately they were pretty meh...not worth the effort, in terms of either texture or taste.
Nicole on 2026-04-06 (5 stars): I made these for an Easter family dinner and they were delicious, received loads of compliments. The recipe was easy to follow!
Michelle on 2026-04-09 (5 stars): Made these for Easter Dinner. They turned out absolutely fantastic! My daughter said no other rolls allowed from here on out! I did the first rise in the oven with the proof setting for 60 minutes and it was perfect. Divided and rolled the balls and back into the oven (turned off now) for 30 minutes and they were perfectly risen. Baked on a lower rack for 23 minutes and they came out perfect. Thank you so much!!!
DLM on 2026-04-11 (5 stars): You have an almost identical recipe on the Red Star website. This one calls for 3 cups flour and 1 egg. The other one calls for 3 1/2 cups flour with 1 egg and 1 egg yolk. Does the additional flour and egg yolk recipe just give you more dough? Which one is actually best to use?
Jennifer on 2026-04-13 (5 stars): I finally successfully made dinner rolls! I've tried different recipes, and they have alwaus come out too heavy and dense. I thought I would give this recipe a shot, amd oh my! My rolls turned out perfectly. They were light and soft and oh so delicious. My first batch made 15, and my family gobbled them up in one day! I made a second batch last night and will be freezing them to pair with our dinners this week.
Joy on 2026-04-19 (1 stars): I cannot for the life of me figure out what I am doing wrong. I’ve made these three times and I cannot get the dough to rise. My kitchen is not too cold, I tried three ways off raising it (in the oven turned off, in the corner, out of reach of any potential drafts, etc). I tried kneading this by hand, and by KitchenAid mixer. My yeast foams, so it is alive. I feel like a moron this is clearly a winning recipe for so many people. I’m not an inexperienced baker I bake lots of things regularly but I am newish to bread. Any idea why it wouldn’t rise?? I did get these to be successful one time but they were so dense and not soft at all.
Corrie on 2026-04-24 (5 stars): When I first started baking breads, I would have the same issue. Be sure you aren't packing your flour tightly. You can spoon in the cup measure to avoid this or scoop and release a few times to lighten up...I always go off the feel of the dough versus the exact cup amount! Good luck!
Marshall Jones on 2026-05-10 (5 stars): Great recipe, and clear instructions. I've already eaten four, and they're not even fully cooked yet! Prepared as per instructions, with excellent results. The only thing I'll do differently next time is to leave out the honey in the after baking butter brush. Will be making these again. They remind me of the dinner rolls my mom used to make when I was a kid. Thanks!
David Hawthorn on 2026-05-16 (5 stars): I make lots of bread using many recipes…these soft dinner rolls are miles away the best and are absolutely loved by every member of my ever growing family, young and old. I do take a few short cuts but they always come out well. You can also vary the size of the rolls. They are utterly delicious but so easy to make.
Amira on 2026-05-29 (5 stars): We live these buns! I’m wondering if they’d work for sliders?