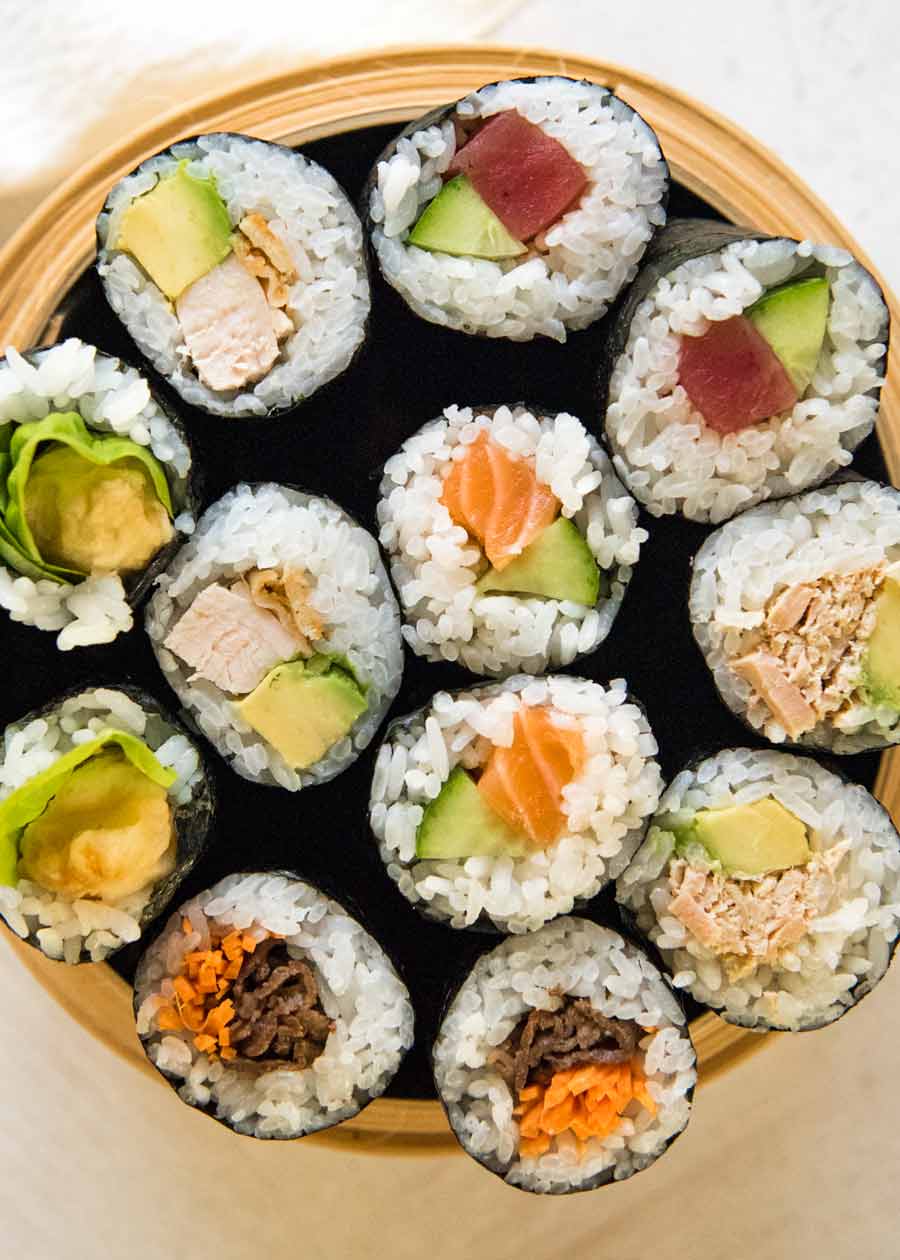


Today's sushi rolls are just like the those you buy from take away sushi shops. It’s not very difficult once you’ve prepared the ingredients to go in the middle. Here is how to make Take Away Sushi Rolls step-by-step.This is a long recipe only because I included very detailed step-by-step instuctions for rolling a ssushi as well as instruction for preparing 6 different fillings. Prep Time and Cook Time are based on making 6 rolls with Beef Teriyaki & Julienned Carrots. Time to cook rice is not included.
Prep time: PT30M
Cook time: PT5M
Total time: PT35M
4.94 stars (16 reviews)
sushi recipe, sushi rice, sushi rolls, take away sushi
- Add rice wine vinegar, sugar and salt in a jar or a bowl. Mix well until sugar and salt are dissolved.
- Add half of the vinegar mixture to the rice, spreading evenly and mix well using a spatula in cutting motion so that the rice grains do not break or get squashed.
- Add the remaining vinegar mixture and mix well in the same way. If you can, fan the rice to cool it down quickly to let the moisture evaporate faster.
- Place a nori sheet, smooth side down on a sushi rolling mat, aligning the cut end of the edge to the end of the mat closest to you.
- Wet your hands with the vinegar water in the bowl, take ⅓ of the sushi rice and make an oval ball. Place the rice in the centre of the nori sheet and spread the rice in all directions, leaving a 2cm border on the side furthest from you (step-by-step photo ①). Ensure that the rice evenly covers the nori sheet and do not press the rice down too hard..
- Place your choice of fillings onto the nori sheet, as per the sections below (step-by-step photo ②).
- Using the thumb and index finger of both hands, hold the end of the mat and lift it up. Then place your middle fingers and ring fingers on the fillings firmly (step-by-step photo ③). While placing these fingers on the fillings, roll the bamboo mat away from you (step-by-step photo ④).
- When the edge of the nori is at the top, let go of your middle and ring fingers and keep rolling slowly until the edge of the nori reaches the other end of the rice (step-by-step photo ⑤).
- By now, the mat should be completely covering the sushi roll (step-by-step photo ⑥). Don't roll the end of the mat into the rice! Press the rolling mat around the sushi roll gently but firmly.
- Hold the roll by placing one hand over the mat, then pull the end of the mat with the other hand a few centimetres away from yousothat the sushi inside the mat rolls a further 90 degrees or so (step-by-step photo ⑦), overlapping with the end of the seaweed sheet that does not have rice on it.
- Using both hands, gently but firmly press the mat over the sushi roll (step-by-step photo ⑧), then remove the mat (note 9).
- Place the sushi roll on the plate/cutting board with the overlapping seaweed line down.
- Leave the roll for a couple of minutes to let the seam stick.
- Wipe a sharp kitchen knife with a wet towel to give moisture to the knife. This will prevent the knife from sticking to the rice, resulting in a clean cut.
- Cut the roll in half.
- Place a fish strip and a cucumber wedge together in the middle of the rice horizontally.
- Line up 2-3 slices of chicken cutlet connected to each other horizontally in the middle of the rice.
- Place 3 avocado slices, breaking in the middle of the arch if the arch is too high so that the avocado piece can be placed along with the chicken.
- Put tuna in a bowl. If it came in chunky pieces, break them into flakes using a fork.
- Add mayonnaise and mix well. Season with salt and pepper.
- Spread ⅓ of the tuna mixture in the middle of the rice horizontally, making a narrow mound.
- Place 3 avocado slices, breaking in the middle of the arch if the arch is too high so that the avocado piece can be placed along with the tuna.
- Line two green leaves connected together to cover the centre of the rice horizontally.
- Place two tempura prawns, tail ends in the middle and overlapping slightly, on the green leaves.
- Add oil to a frying pan over medium high heat.
- Add beef slices and sauté until slightly browned and beef is nearly cooked through for about 1-2 minutes depending on the thickness of the slices.
- Add soy sauce, sake, mirin and sugar to the pan and mix with the beef. When the sauce is nearly evaporated, transfer the beef slices frim the heat and cool them down.
- Spread ⅓ of the beef in the middle of the rice horizontally, making a narrow mound.
- Spread ⅓ of the carrots along the beef.