
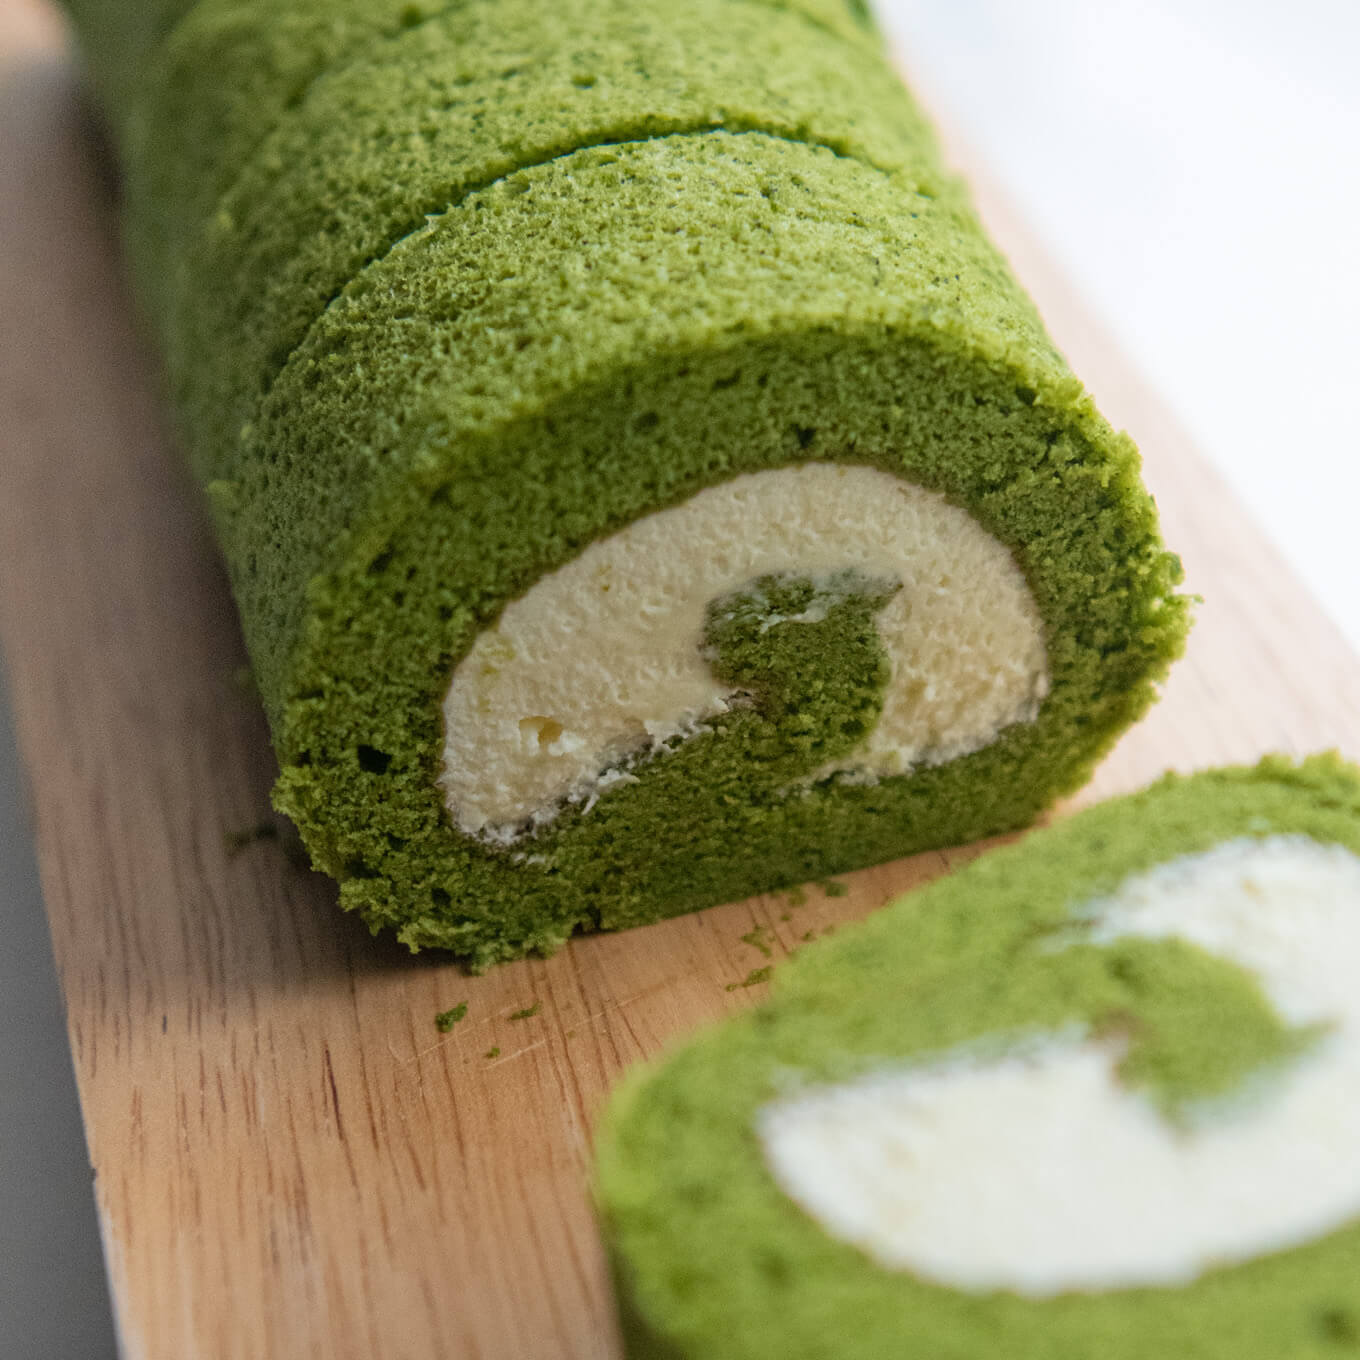
My Matcha Roll Cake is a matcha-flavoured fluffy Swiss roll with a swirl of fresh cream. The colour contrast of green and white is impressive, and the soft sponge with its elegant sweetness is characteristic of Japanese cakes.See the video.
Prep time: PT30M
Cook time: PT16M
Total time: PT361M
5 stars (7 reviews)
chiffon cake, japanese cake, Matcha cake, matcha dessert
- Mix all the Dry Ingredients well, but gently, in a small bowl. Matcha powder is so light that it will scatter everywhere if you mix it vigorously.
- Place the egg yolks in a medium bowl and mix. Add sugar and beat at high speed until the mixture becomes pale cream in colour and thickens. Draw an infinity symbol on the surface of the batter with the beater. If the pattern stays momentarily, it is ready.
- Add ¼ of the oil at a time to the yolk mixture, beating at high speed each time to ensure that the oil is fully incorporated.
- Reduce the speed of the beater to slow, then add milk in 4-5 batches, beating well each time after adding the milk.
- Sieve the Dry Ingredients mixture and add it to the egg yolk.
- Using a whisk, gently incorporate the flour mixture into the egg yolk mixture. Start from the centre of the bowl in a circular motion, gradually widening the circle. This helps prevent lumps from forming.
- When the batter is mixed well, set it aside.
- Turn the oven on and preheat it to 170°C / 338°F (fan forced), with the rack in the middle position.
- Beat the egg whites in a large bowl. When bubbles form and the mixture becomes whitish, add ⅓ of the sugar and beat for 10-15 seconds. Repeat twice adding another ⅓ of the sugar each time, beating after each addition of sugar.
- Continue to beat until the meringue forms medium peaks (when you lift the beater/whisk, the peak will form but curl slightly at the tip, see the video).
- Using the whisk, mix the batter slightly, then transfer about ⅓ of the meringue to the bowl with the batter.
- Fold the batter and meringue mixture gently using the whisk. Then transfer the batter to the bowl with the remaining meringue (use a spatula to scrape all the batter out of the bowl). It’s ok if a small amount of meringue is not fully incorporated in the batter at this stage.
- Fold the mixture using the whisk until mostly combined. Then switch to a spatula and continue folding until there is no trace of white meringue. Do not overmix, as it will break the small air bubbles, resulting in a flat, dense sponge cake.
- Transfer the batter to the baking tray lined with baking paper. Using a scraper, spread the batter, leveling the thickness. Ensure that each corner of the tray is filled with the batter (note 5).
- Drop the tray from about a 10cm / 4” height a couple of times to remove air pockets in the batter.
- Place the tray in the oven on the middle shelf and cook for 16 minutes.
- Remove the tray from the oven and transfer the cake, including the baking paper to a cooling rack.
- Quickly cover the surface with cling wrap (to retain moisture), then turn the cake upside down so that the baking paper is on top. Make sure the entire surface of the cake is covered. Let it cool to room temperature.
- Combine the Filling ingredients in a medium bowl and beat with an electric beater or whisk.
- Beat the cream until it becomes slightly stiffer than the usual whipped cream used for cake decoration (note 6).
- Lightly wet 4 sheets of kitchen paper and place them on the workbench, forming a large square (or use other material as per note 7). This will stop the baking paper from slipping when rolling the cake.
- Gently remove the baking paper from the cake.
- Cut a new piece of baking paper twice the length of the sponge cake and place it over the cake. Align the edge of the paper to the side of the cake farthest from you, allowing the paper to extend 2-3cm / ¾-1⅛" beyond the cake.
- Slide the cake, with the cling wrap and baking paper intact, off the rack and move it to the work bench.
- Pick up the far edge of the cake together with the baking paper and cling wrap. Turn the cake upside down by bringing the lifting edge towards you. The cling wrap should now be on top.
- Gently remove the cling wrap (it’s ok if part of the brown surface comes off), then transfer the baking paper with the cake onto the wet kitchen paper. The edge of the cake closest to you should sit 2-3cm / ¾-1⅛" inside of the edge of the baking paper (note 8).
- Put all the whipped cream in the middle of the cake. Using an icing spatula, spread the cream, ensuring the thickness of the cream is even (note 9).
- Wipe off about 2cm / ¾" of the cream along the edge farthest from you and reserve the removed cream.
- Draw a line with the icing spatula about 1cm / ⅜" from the edge closest to you, lightly cutting into the sponge. This will allow you to easily fold the edge of the sponge and form the core of the roll cake.
- Lift the paper closest to you and gently fold the edge of the cake along the line you just drew. If necessary, use your fingers to fold the cake firmly to create the starting point of the roll.
- When the edge of the cake reaches the top, pull the paper forward, which will roll the cake. You may need to place your fingers on top of the cake initially when you start rolling. The paper should be held parallel to the workbench all the way until the end of the roll.
- When the rolled cake reaches the end and the seam is at the bottom, unroll the paper and fill both sides of the roll with the leftover cream so that the cream will be filled to the edge without a gap.
- Put back the paper over the rolled cake again and ensure the seam is at the bottom.
- Place a long ruler (or something similar) on top of the paper that the roll cake is wrapped in, so that the top part of the baking paper meets the bottom part. Then pull the paper that is sticking out from underneath the roll cake while pushing the ruler inward. This tightens the entire roll, resulting in a neatly shaped, round roll cake.
- Leaving the paper tucked in by the ruler, continue rolling the cake with the paper until the seem is at the bottom.
- Cover both edges of the roll cake with cling wrap to prevent it from drying out, then chill it in the fridge for at least 3 hours. Overnight is also OK.
- Unwrap the paper. Cut about 1cm / ⅜" off both ends of the roll (note 10).
- Clean the knife using a damp towel or kitchen paper after each cut.
- Cut the roll cake into 8 slices and serve.