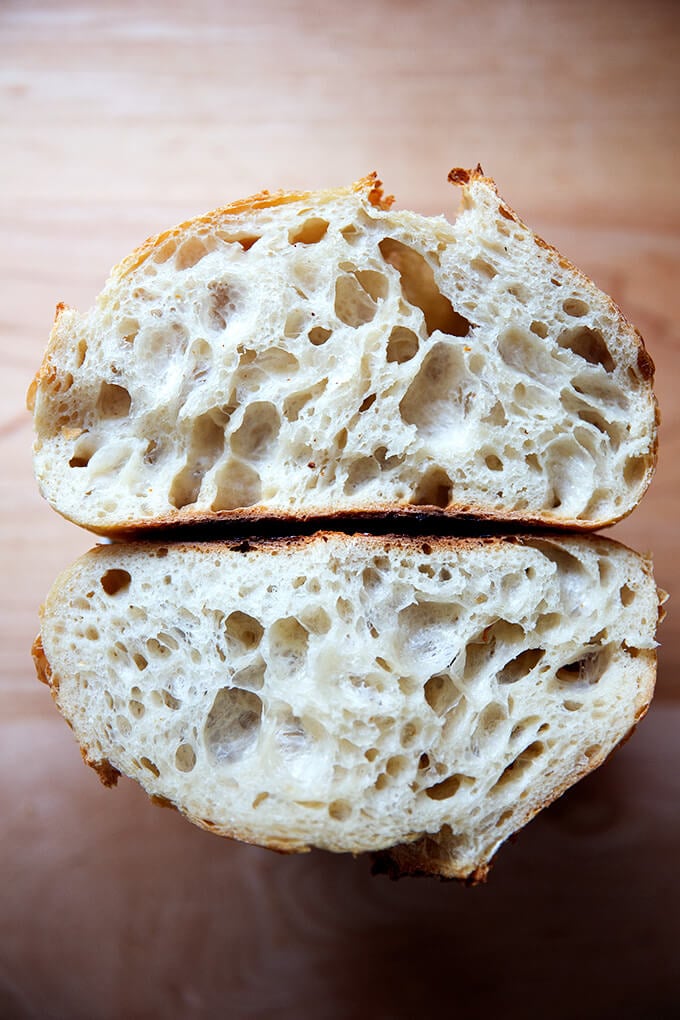
If you love fresh sourdough bread with a golden, crisp crust and a light, airy crumb, this recipe is for you. It's one of the simplest homemade sourdough bread recipes, and one of the best, too. It requires only 25 minutes of hands-on work and no autolyse or preferment. Below you will find guidance for every step of the way. 🍞🍞🍞
Inspired by The Clever Carrot
If you are new to sourdough, watch the step-by-step video here: Simple Sourdough Bread or in the post above.
Troubleshooting: If you have issues with your dough being too sticky, please read this post: Why is my sourdough so sticky? The 4 common mistakes.
Notes:
You need an active sourdough starter. I have had success activating starters from:
King Arthur Flour
Breadtopia
As always, I highly recommend investing in a digital scale before beginning any bread baking adventure.
This is the Dutch Oven I use for sourdough bread. I used this Dutch oven for years, and it's a great one, too.
Flour sack towels are a great investment because they ensure your dough will not stick while it is proofing.
I love using rice flour for dusting (as opposed to ap or bread flour) because it doesn't burn. When you use a flour sack towel, however, you don't need to use any flour.
Find all of my sourdough essentials here: Essential Equipment For Sourdough Bread Baking
I love a high-hydration dough, and I have great success using 380 grams of water in this recipe, so feel free to play around and push the hydration here.
Salt: I have had success using both kosher salt and fine sea salt here. When I use kosher salt, I use the Diamond Crystal brand. When I use sea salt, I use the Baleine Fine brand. Regardless of the brand, I use 12 grams.
Shaping: If you're looking to get a more open crumb, try shaping a batard (as opposed to a round). Watch this video for guidance. Also: The recipe below follows the traditional shape once, rest, then shape again method. I often skip the preshape now and simply shape the dough once. I still get a nice open crumb.
Adding Other Ingredients: See this post on adding "inclusions": Rosemary-Olive Sourdough Bread (+ A Better Way to Add Inclusions to Your Sourdough Bread)
How much Sourdough Starter to Use?
Because my kitchen is cold for much of the year, I like using 100 g (1/2 cup) of starter as opposed to 50 g (1/4 cup). When determining how much starter to use, consider a few things: If you live in a warm, humid environment, 50 g should suffice. If you plan on doing an overnight rise, 50 g also should suffice. If you want to speed things up or if you live in a cold environment, consider using 100 g starter. Note: If you use 100 g of starter, your dough may rise more quickly, so keep an eye on it. As always, rely on the visual cues (increasing in volume by 50%) when determining when the bulk fermentation is done.
A straight-sided vessel makes monitoring the bulk fermentation especially easy because it allows you to see when your dough has truly doubled.
50 – 100 g (1⁄4 – 1/2 cup) bubbly, active starter — I always use 100 grams, see notes above
375 g (1 1/2 cups plus 1 tbsp) warm water, or more, see notes above
500 g (4 cups plus 2 tbsp) bread flour
9 to 12 g (1.5 – 2.5 teaspoons) fine sea salt, see notes above
Categories
Bread
Cuisine
American
Steps
Whisk the starter and water together in a large bowl with a fork or spatula. Add the flour and salt. Mix to combine, finishing by hand if necessary to form a rough dough. Cover with a damp towel and let rest for 30 minutes.
After 30 minutes, grab a corner of the dough and pull it up and into the center. Repeat until you’ve performed this series of folds 4 to 5 times with the dough. Let dough rest for another 30 minutes and repeat the stretching and folding action. If you have the time: do this twice more for a total of 4 times in 2 hours. Note: Even if you can only perform one series of stretches and folds, your dough will benefit. So don’t worry if you have to run off shortly after you mix the dough.
Cover the bowl with a damp towel or, ideally, a lid or something that will create an airtight seal to prevent the dough from drying out. Let the dough rise at room temperature, about 8 to 10 hours at 70°F (21°C) or even less if you live in a warm environment. The dough is ready when it has increased by 50-75% in volume, has a few bubbles on the surface, and jiggles when you move the bowl from side to side. (UPDATE: In the past I have recommended letting the dough rise until it doubles in volume. If you’ve had success with this, continue to let the dough double. Recently, I have been stopping the bulk fermentation when the dough increases by 50% in volume, and I feel I am actually getting better oven spring in the end.) (Note regarding timing: If you are using 100 g of starter, the bulk fermentation may take less than 8 to 10 hours. If you live in a warm, humid environment, the bulk fermentation may take even less time. In the late spring/early summer, for example, my kitchen is 78ºF and the bulk fermentation takes 6 hours. It is best to rely on visual cues (increase in volume by roughly 50%) as opposed to time to determine when the bulk fermentation is done. A straight-sided vessel makes monitoring the bulk fermentation especially easy because it allows you to see when your dough has truly increased in volume by 50%.)
Coax the dough onto a lightly floured surface. Gently shape it into a round: fold the top down to the center, turn the dough, fold the top down to the center, turn the dough; repeat until you’ve come full circle. If you have a bench scraper, use it to push and pull the dough to create tension.
Let the dough rest seam side up rest for 30 minutes. Meanwhile, line an 8-inch (20-cm) bowl or proofing basket with a towel (flour sack towels are ideal) and dust with flour (preferably rice flour, which doesn’t burn the way all-purpose flour does). Using a bench scraper or your hands, shape it again as described in step 4. Place the round into your lined bowl, seam side up.
Cover the dough and refrigerate for 1 hour or for as long as 48 hours. (Note: I prefer to let this dough proof for at least 24 hours prior to baking. See video for the difference in the crumb of a loaf that has proofed for 6 hours vs one that has proofed for 24 hours. If you choose to proof the dough in the fridge for an extended period of time, you may want to tuck it into a loosely tied bag — produce bags from the grocery store are great for this purpose — to ensure the dough does not dry out. The original recipe calls for a 1-hour rise, and if you have had success doing that, by all means, keep doing it.)
Place a Dutch oven in your oven, and preheat your oven to 550°F (290°C). Cut a piece of parchment to fit the size of your baking pot.
Place the parchment over the dough and invert the bowl to release. Using the tip of a small knife or a razor blade, score the dough however you wish — a simple “X” is nice. Use the parchment to carefully transfer the dough into the preheated baking pot.
Lower the oven to temperature to 450ºF (230ºC). Carefully cover the pot. Bake the dough for 30 minutes, covered. Remove the lid, lower the temperature to 400ºF (200ºC) and continue to bake for 10 – 15 minutes more. If necessary, lift the loaf out of the pot, and bake directly on the oven rack for the last 5 to 10 minutes. Cool on a wire rack for 1 hour before slicing.
This loaf will stay fresh up to 3 days stored at room temperature in an airtight plastic bag or container. It freezes beautifully, too.
Reviews
Rue on 2026-08-02 (5 stars): Great instruction. Thankyou Ali. I have not made sour dough for more than 20 yrs. Then a friend gave me some starter recently and I needed the next steps and your detailed instructions were perfect.
xo
Ron Doty on 2026-08-04 (5 stars): THANK YOU! Thank you for your in depth thought and answers to questions we all have. So many others who write recipes seem to think we ( those of us who read their recipes) can read their minds!! You have taken all the guess work out of the equation. So a big thanks to you for doing that for us dummies. I have been working on my sourdough bread for a good part of 6 months. Now that I have found you my dear, I am well on my way to GREAT BREAD. I LOVE YOU. I am going to give inclusions a try next. I am very excited.
Ron D.
Jan Collins on 2026-08-05 (5 stars): I did it!!!! My first time making sourdough and it worked perfectly. I love your recipe and instructions.
Vickee Widbin on 2026-08-06 (5 stars): This has been my go-to sourdough bread recipe for several years now. I tried several others with limited success. This has never failed me once.
Olivia on 2026-08-10 (5 stars): This was the first recipe I ever used and it'll definitely be the last. Perfect. Literally nothing went wrong, I've done it multiple times now and it's very flexible.
One question though....
If I were to do a half batch how long should I bake it for? I want to split the dough when laminating so I can do two smaller Flavours so that it works out cheaper and less time consuming for me to experiment!
Catherine Astor on 2026-08-11 (5 stars): This recipe is absolutely foolproof! Using 100 G of starter has been key for me and every loaf of bread comes out perfect! Thank you for this recipe
APRIL A AMELUNG on 2026-08-14 (5 stars): I love this recipe and appreciate the explanation of each step. The videos helped alot. My sourdough bread turns out super 👌
Denise on 2026-08-17 (5 stars): Well, I have to say you have taken the mystery out of sourdough starters and sourdough bread...and am so glad! I am new at this and when I showed my friends after my 4th loaf....they thought I had been secretly hiding my talent.....I have to thank you over and over again. I absolutely found your videos so helpful for the guidance I needed to follow each step. I have upped my game and bought similar baking tools you use. Including a banneton with cover....you are incredible. I am going to be 75 in September and what a joy to be able to learn new things from someone who is shares her talent and knowledge so freely. You are a blessing to all ...
charrington on 2026-08-17 (5 stars): i'm cold proofing now and will bake soon. can I use a loaf pan instead of a dutch oven?
charrington on 2026-08-18 (5 stars): Thanks for the quick answer! I have 2 lodge cast iron loaf pans and planned on using one as a cover. I can definitely pre heat - assuming the bake time will be similar? i just really like the loaf shape, as i've made sourdough sandwich bread too.
charrington on 2026-08-19 (5 stars): Thanks very much!
Trixie on 2026-08-18 (5 stars): Very easy to understand and follow can't wait to get started baking